Home / Help / How to install the Vynix widget on any website
guide
How to install the Vynix widget on any website
Updated 21 June 2026
You can add Vynix to most websites by placing a lightweight widget script in your site code. Once installed, your team can click on a problem, capture the page context, and turn it into a ready-to-build prompt or GitHub issue.
Open your Vynix workspace and go to the widget installation or setup area.
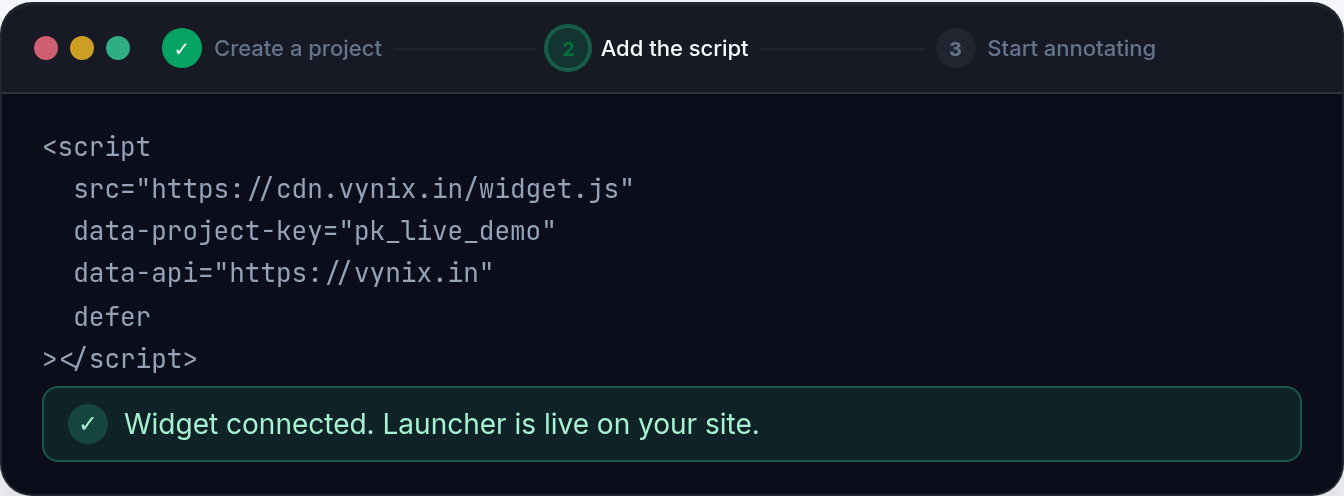
Copy the widget embed code for the site you want to connect. Check the Vynix docs if you need the latest script format: https://vynix.in/docs
Paste the script into your website, usually before the closing
tag or through your tag manager.
Publish or deploy your site changes.
Open your website in a browser and confirm the Vynix widget appears. Click it to test an annotation capture.
Vynix works by loading a small widget on your site. When someone reports an issue, Vynix captures the selected element, a screenshot, console and network context, and an AI diagnosis of the likely root cause.
After a capture, you can copy a prompt for your coding agent or create a GitHub issue and assign it to your workflow. This helps developers understand what broke, where it happened, and what context was available at the time.
If your site uses a framework, CMS, or tag manager, install the widget in the shared layout, global footer, or site-wide script area so it loads on every page where you want annotations available.
Installing the Vynix widget with one script tag
Related questions
Where should I place the Vynix script?
For most websites, place it near the end of the page before the closing tag. If you use a framework or CMS, add it to the global layout or site-wide scripts area. For exact platform guidance, check the Vynix docs.
Do I need to change my app code to use Vynix?
Usually no major app changes are needed. You only need to add the widget script and deploy the update. Once it loads, Vynix can capture annotations, screenshots, console context, and network context from the page.
Still need help?
Read the full documentation or email hello@vynix.in.